Showing posts with label hallway. Show all posts

Monday, January 4, 2016

Attic Hallway

Look at the little landing at the top of the third floor stairs!
View from the stairs
Our contractor still needs to build a step to go up to the storage room door.  In the meantime, I put a little rug up there (which I had from my college dorm room days!)  The table was given to us as a wedding gift by Mike's parents.  It fits perfectly in the little spot!


View from the end of the hallway, near the media room door.

We painted the walls the same gray as the foyer and second floor hallway.  We found all of the door hardware pieces we needed for all of the new doors (the doorknobs and we're swapping out most of the brass hinges for brushed nickel).  I'm in the process of getting stuff up on the walls, and will post about that once the contractor finishes the step and we can call it done!

Wednesday, December 23, 2015

Coat Closet

This may not be the most exciting news, but I feel like ONE (little) THING is finished!

They finished the moulding for the doorway of the new coat closet in the downstairs hallway... We jumped right in there and added a shelf and primed/painted and then Mike put in the bar.
We also picked out the door knobs- although that was a fiasco.   These are new doors, and the old-style knobs that we selected were too small for the gigantic holes that are pre-cut in these doors.  And, of course, we couldn't find any modern-style doorknobs (that would fit the pre-cut knob holes) that we liked.  

So Mike had to fill the "new" door knob holes by cutting circles out with his saw.  He then drilled a hole in the center for the hardware to go through.  He used wood glue to secure the circular wood piece in the hole.  Once dry, we could install the knobs.  We need to do this on ALL of the doors that we have chosen the glass knobs for (total of 5- master bath, master closet, laundry room, attic storage & the hall closet)

The last part needed was the circular plate (sometimes called rosette) that goes between the knob and the door, covering the patch.  
The local home improvement store didn't have enough of them, so we're on the hunt for one more!

I'm happy to be moving our winter coats down from our office, so that room can start to get straightened up!


Wednesday, October 7, 2015

Sheetrock- Day 13

Second coat of spackle on the kitchen walls & ceiling:
View from the back door

View from the dining room doorway

View from the corner of where the  cabinet  & stove will be

First coat on the hall way closet:

Second coat on the third floor stairwell:

Due to the uneven wall/ceiling, they had to come up with a fix for the edge where the wall meets the ceiling.

I guess it will work- but I'm wondering what will be the best way to paint this so that it's least noticeable. The walls will be gray and the ceiling white- I'm afraid that whatever I do will draw the eye towards it.  We'll see!

Friday, June 5, 2015

Break Through- Second & Third Floor!

The dust is now throughout the house, since there are holes everywhere.
Oh well- at least it's progress!

Here's what's going on for the second floor...

Main Hallway Opening
This opening will be into the laundry room
Master Bedroom Opening
This will open into the Master Bath & Closet
They have put the plastic up, but are holding off on braking through on this one.


Here's the progress up on the third floor...
Attic Opening
Looking up from 2nd floor landing
Ugh, these photos remind me of all that wallpaper removal & spackling we did!  

Looking across from between Media Room/Linen Closet doorways
 This was exciting because we got the first peek into the new attic space!


Friday, January 3, 2014

Spackling the Hallways

When the guys were doing the media room sheet rock, Mike asked them for their advice about the hallway walls.  They recommended we use this stuff for the first two coats (sanding in between):

And then do a finishing coat with this stuff:


 We started a first coat up in the third floor hallway, and after getting the hang of it, made our way down.


Here's the second floor hallway with the first coat...


Now we've sanded and are getting the second coat on...  progress!

It looks so much better than the gray horse-hair plaster walls!
BEFORE

In Progress!


Monday, December 23, 2013

Hallway Progress

The second floor hallway had been on hold while we waited for the media room to get further along, and we could do the second & third floor hallway spackling all at once.

So, this past weekend every free minute that wasn't spent at the kids' sporting events, we worked to make some progress!

First, we decided that the top section of wall near the bathroom door was cracked beyond repair.  So, we needed to rip down the old plaster...

And then Mike installed new sheetrock... and spackled the nail holes & seams.


 The little pieces above the door frames of bathroom and our master bedroom hallway needed to be replaced too...

We're also working on that cracked ceiling!


Meanwhile, up in the media room, there were little dots from the spray insulation covering the beams, which needed to be scraped clean before I can white wash them.  I used a wire brush and a sanding block.
 
The top is the "Before Scraping" the bottom is "After"- so much better!


The upstairs is incredibly dusty right now, but I'm feeling good about it. 

We're almost finished with the first coat of spackle (it's going to take three coats- ugh!)  Here's a sneak peak...

Monday, November 25, 2013

Catching Up- November 2013

Here are more random items from the past month that I didn't get onto the blog!

The attic/media room project is moving along (currently getting more estimates for sheetrock, and trying to schedule the insulation guys!)

In the meantime, we've had other little things keeping us busy...

Our youngest's birthday party was last month- it was a Scooby Doo theme (see more here and here).

We lucked out with great weather and were able to have it entirely outside- a very good thing, considering the upstairs hallway is STILL in bad shape!


Just in case guests needed to use the bathroom, I hung these signs up...


Since then, we're working more on the hallway... There's still one wall with wallpaper to remove.  This got put on hold when I got two herniated discs in my neck from removing the majority of it!  I'm not looking forward to jumping back into that!

But the rest of the hallway has gotten a first round of sanding and spackling.  I took a break one day and came back to find this...
I was told it's "bear tracks in the house!"  At least we're still having fun around here!


We were given some house plants from my aunt & uncle!
One is a huge fica tree that's at least 20 years old!  Some of the branches were beat up from the move, so Mike trimmed it back, and braided it's trunk a little further (the bottom was already braided).
Here it is during the trimming process-->
(I'll have to update with a finished photo...)
We also got a pretty palm...

You can see the rocks we put in the planters.

These are serving two purposes:
1- keeping the plant standing up-right
2- keeping our cat out of the dirt!


There's also a HUGE peace lily plant that I need to get photos of... Mike was dividing and re-potting it.


Last bit of news is that we ordered the flooring for the attic!

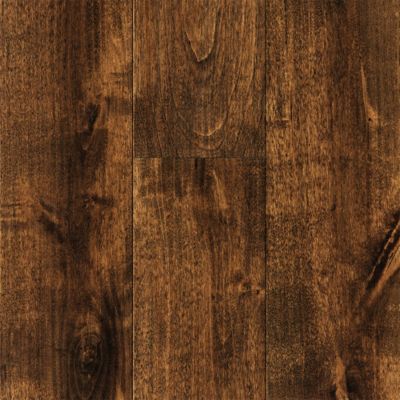
3/4" x 4-3/4" Chocolate BirchThe requirements was for it to be 3/4" hardwood (so that we can re-finish it if we ever need to).
Here's what we ended up with... it's a nice chocolate-y brown, and the boards are 4-3/4" width, so don't look too narrow as some of the other options did.

The best part is that it was on sale at Lumber Liquidator!

Now we wait for it to come in... should be around the second week of December.


I need to get a "To Do" list going on this project, it's just so satisfying to cross things off!  Maybe later this week!

Monday, September 9, 2013

Running out of Steam

Another project from Labor Day weekend... removing the wallpaper in the 2nd & 3rd floor hallways.  This one was a bear (and still isn't completely done!)

The hallways were apparently wallpapered and painted over many times through the years.
And now it's started peeling up at the edges.
It was time to get rid of the vines...
Peeling at the corner of the window


Peeling above the bathroom door


I started by removing as much as I could by hand with a little putty knife.
Which left me with this...


This....


And a whole lotta this...


That final layer of pink paper is the same as what we found in the foyer... and there's even traces of the same hot pink ceiling!  Eeek!


A more recent layer of wallpaper was a floral pattern...

And yet another layer was embossed (though it's hard to see the paisly-ish design in the photo)...


There was at least a 4th layer-that was just brown & had stamped numbers on the back, I think it was a quick-fix to paint over.  Which they did- many. times.

I got out the steamer and spent about 8 more hours to get it all down.  The brown & pink papers weren't too bad... it was the areas with spackle fixes & layers of paint that kept bubbling up which made it a bit difficult.

Mike had to build a little scoffold for me to stand on above the stairs- that section still needs to be finished (I had run out of steam both literally & figuratively!)

So here's pretty much how it's looking...


I didn't take 3rd floor photos, but that's done except for the highest part that requires the scaffold balancing act- which I'm dreading!

In the meantime, see all that gray plaster?  It is the original horse-hair plaster.

Before the paper was down, we considered embracing the old style & texture and just painting it... but now that it's all exposed it's rough to the touch, and you can see the hair in it.  Kinda gross- plus there are a bunch of random smooth spots where fixes were applied through the years.  We definitely need a skim coat.

So, we're currently in the midst of getting estimates.  My goal is to get it done before we have houseguests in October!

It's looking quite dilapidated right now- but it's gotta look worse before it gets better, right? So for now, I'll just continue to close my eyes as I walk down the hall!

Monday, August 5, 2013

Electrical Update- Attic Hallway

Here's where we are with the electrical work in the Attic Hallway/Stairwell...

The light switch at the bottom of the attic stairs has been installed.
BEFORE
Installed... but needing new switch plate!
I'm loving this improvement, since I always get to the bottom of the stairs, usually with my arms full, and realize I forgot to turn off the light switch that's located on the third floor!


The existing flush mounted light fixture was removed, and the box moved to be centered over the stairwell.  They also installed the new fixture.  (Which if you remember, I got a great deal on here!)
BEFORE: Ugly old light fixture,
centered on ceiling, rather than over the stairs.
Reversal for the Before/After shot:
BEFORE
AFTER


The existing switches were tightened up, & one tied to that new switch located at the bottom of the stairs...
BEFORE
AFTER- but needing new switch plate!


So, a lot has been accomplished up here, but still a lot more to do!  First on that list is purchasing new switch plates. 

There's also items like patching the hole from the old light box...

...and the peeling paper that's on the ceiling & walls needs to be removed.  The plaster underneath is a rough texture, so we may need to do a skim coat.  Or I may try the Benjamin Moore Advance Paint and see if that smooths it out...

We also need to refinish the hallway floors, but no sense in doing that until we're done tracking all the building materials up & down!

And, of course, painting all of those rails on the banister (which I'm dreading!)

But for the time being, it's much more functional than it was :)
I'm especially tickled with the new light fixture... here's a look at it from the bottom of the stairs.